How to use image avaialble Project A in Project B
~>Things Doing in Project A
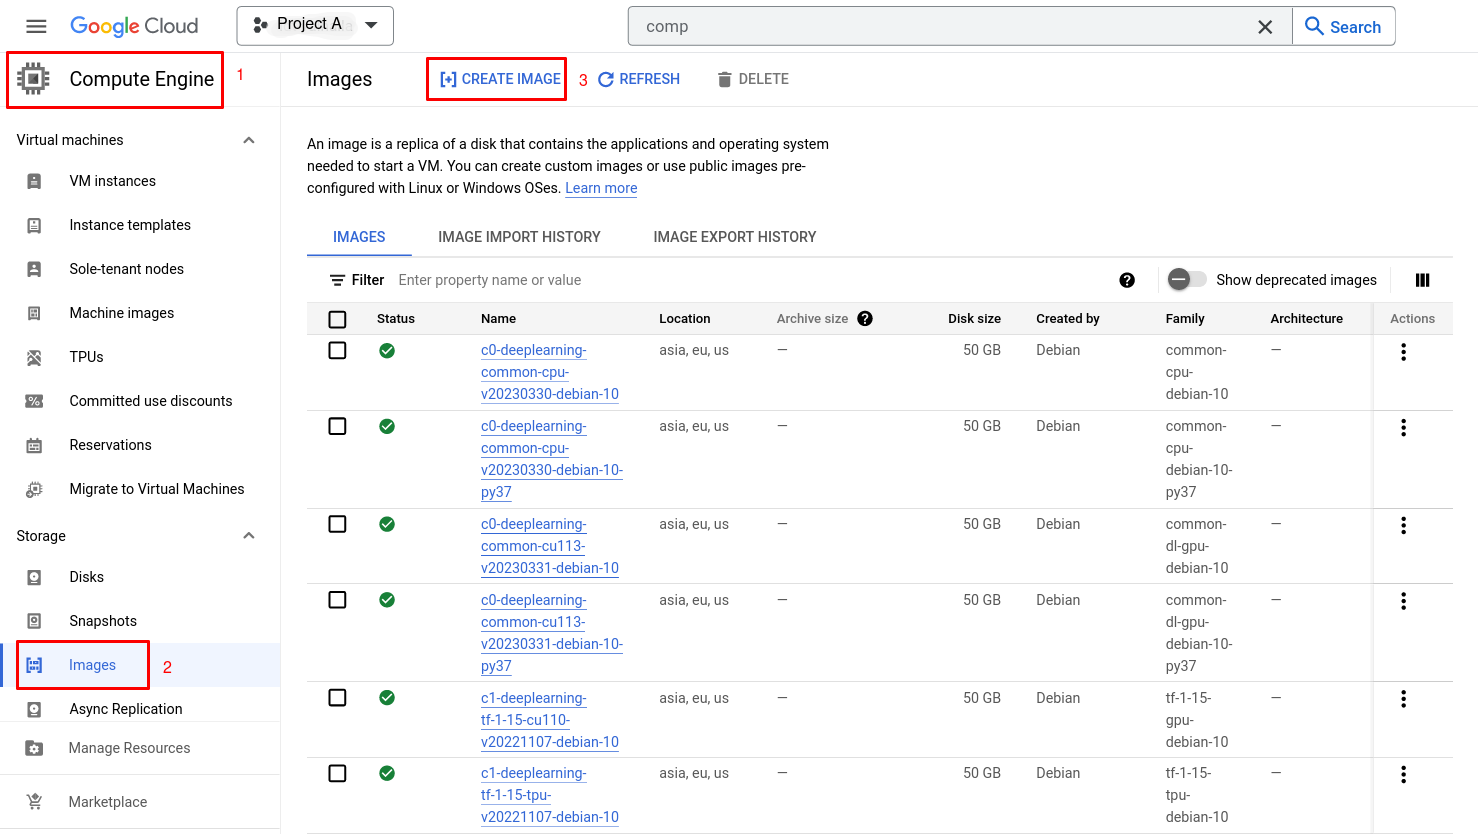
First, let's create an image in Project A from a VM existing in the same project. For this we need to go to the "Compute Engine Service" in that window we will be able to find an option called Images on the left side one we select it we will reach the image creation page, There we can see one option called CREATE IMAGE, click on it.
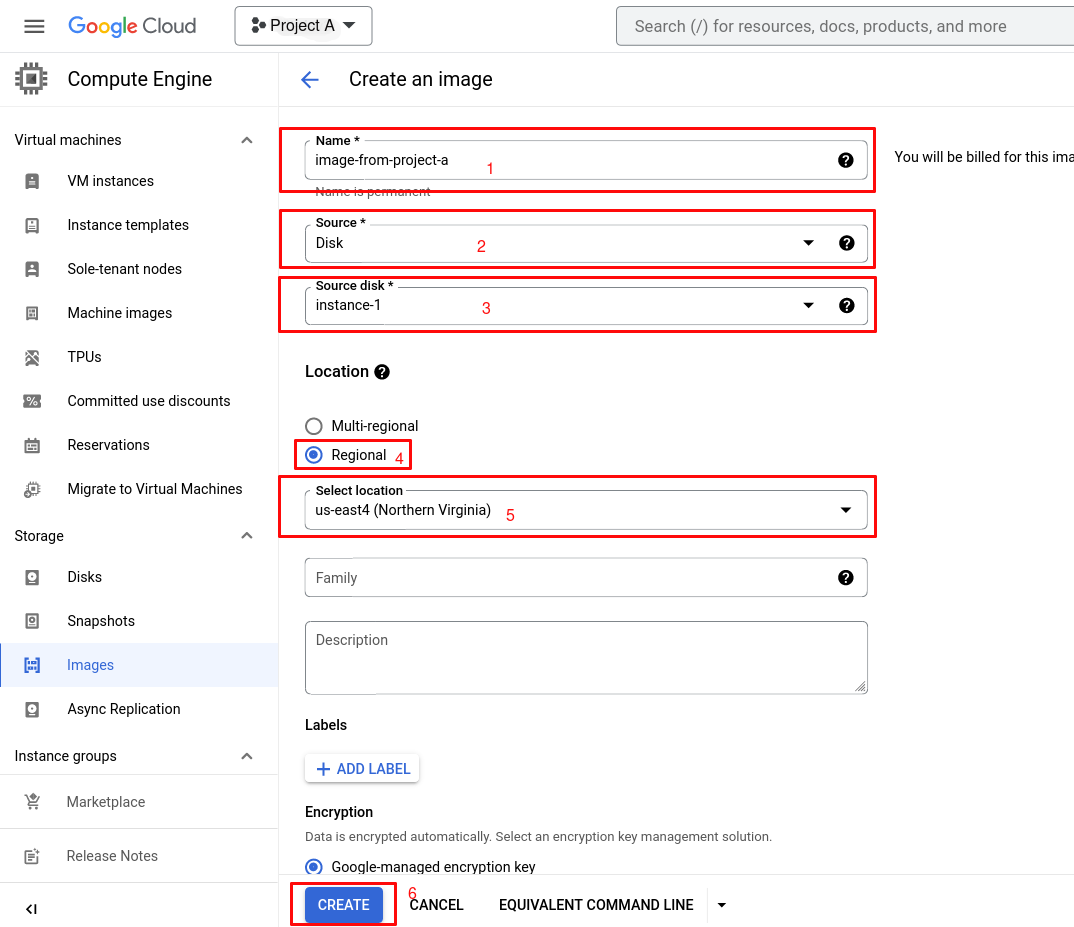
In The create an image window we need to give the below details
| Name: | A name to identify the image (image-from-project-a) |
| Source: | Where exactly we are going to take the Image from, in our case we are going to use the Disk attached to instance 1 existing in project A |
| Source disk: | Here we are selecting instance 1, in which our disk is attached |
| Location: |
Here we opted for Regional, so the image that we are going to create will be available only to that specific region, so the new instances can only be created using the image in US-EAST4 (if we want to create a new instance using that image in all regions, then we need to opt Multi-regional) |
| CREATE BUTTON: |
Once these details are given we can go ahead with the creation of the image (for all other places we can keep the default values eg: Encryption, Family, and Description) |
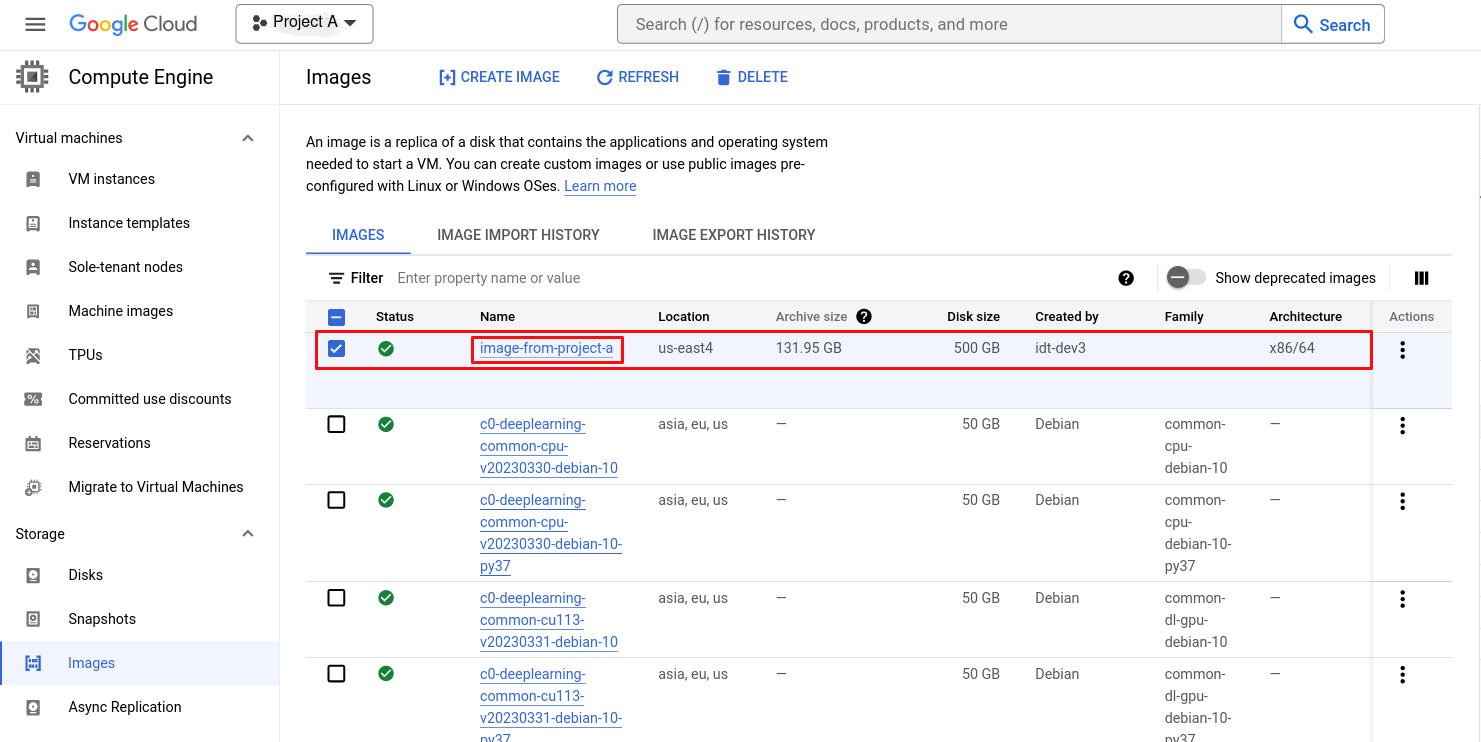
Once the image creation is completed we can see the image name in the list of images as seen in the below snippet
~>Things Doing in Project B
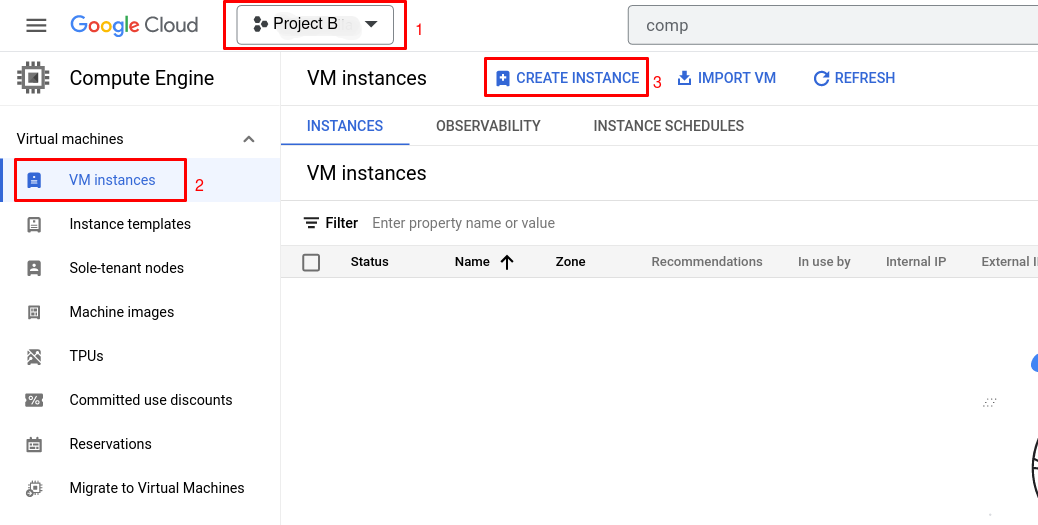
Now Let's move to Project B and try to create a new instance using the image we just created in Project A.
In Project B we need to go to the Compute Engine service page and click on the CREATE INSTANCE options for creating a new VM.
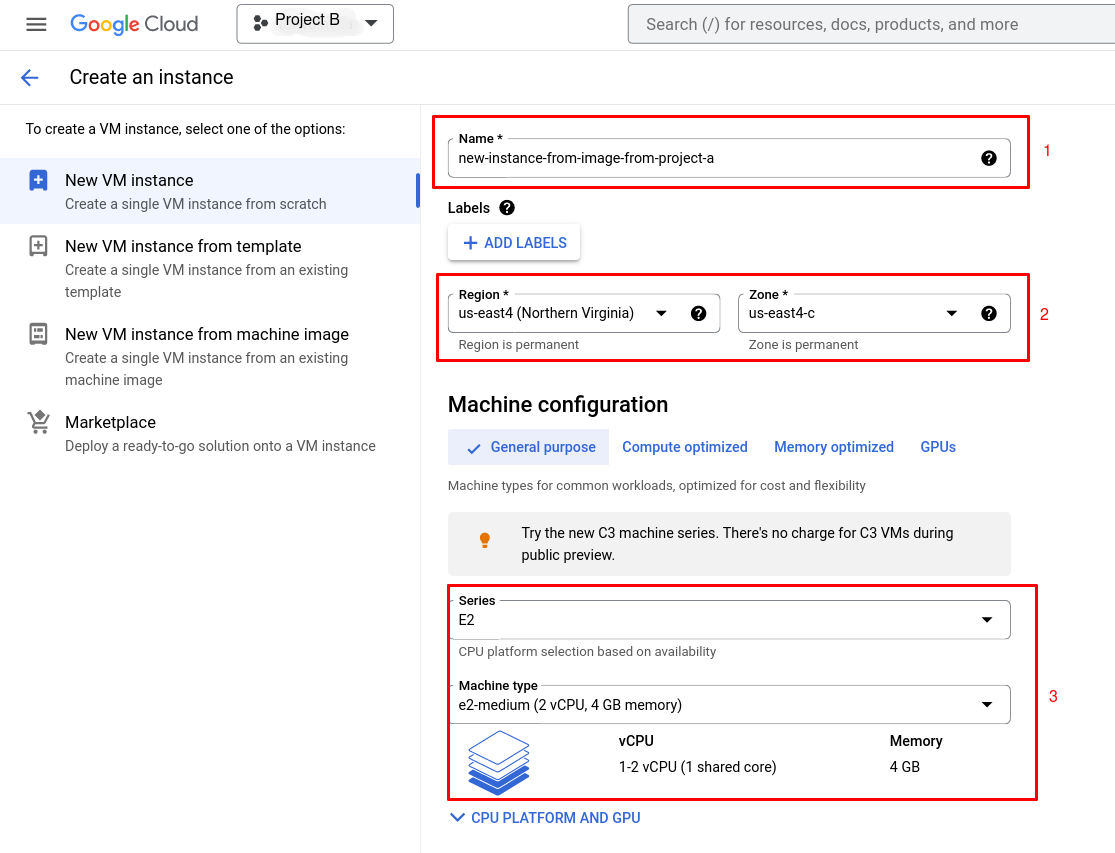
in the Create an instance page first we need to give some details.
Now we can scroll a little bit and select the Boot disk option available on the same page
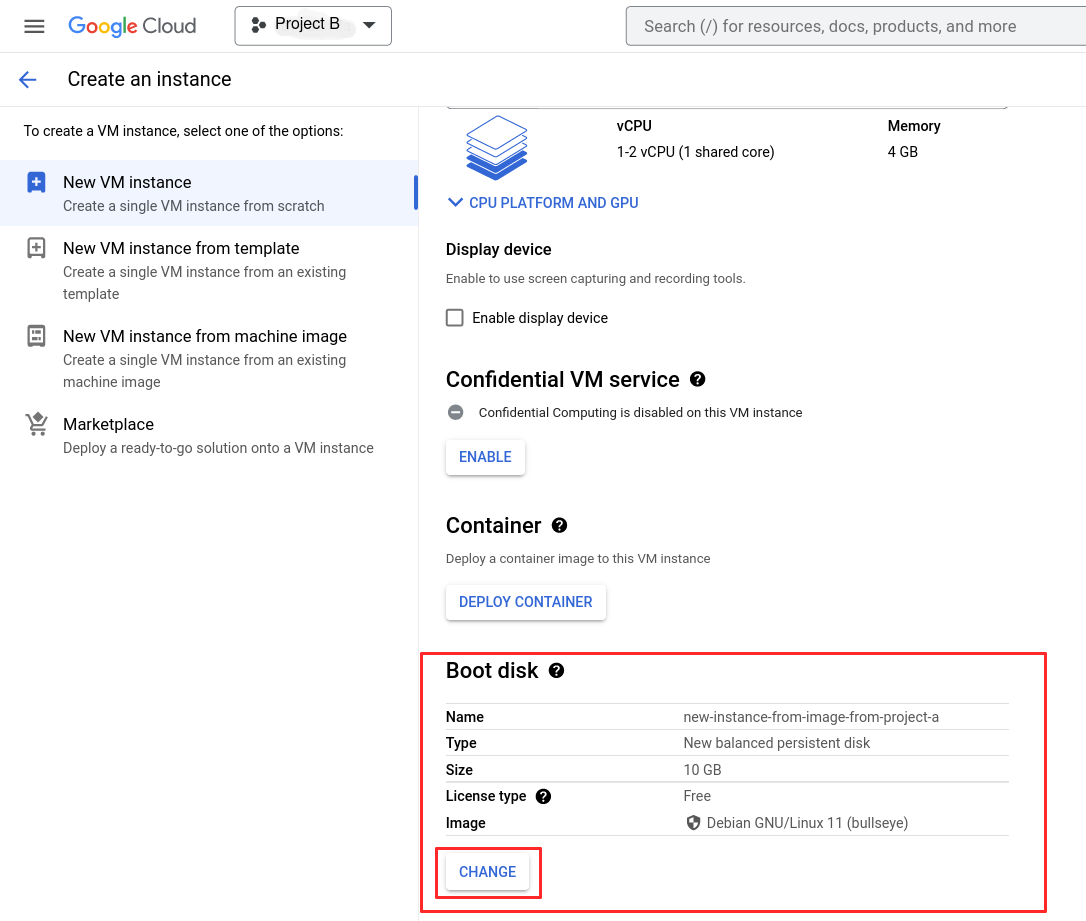
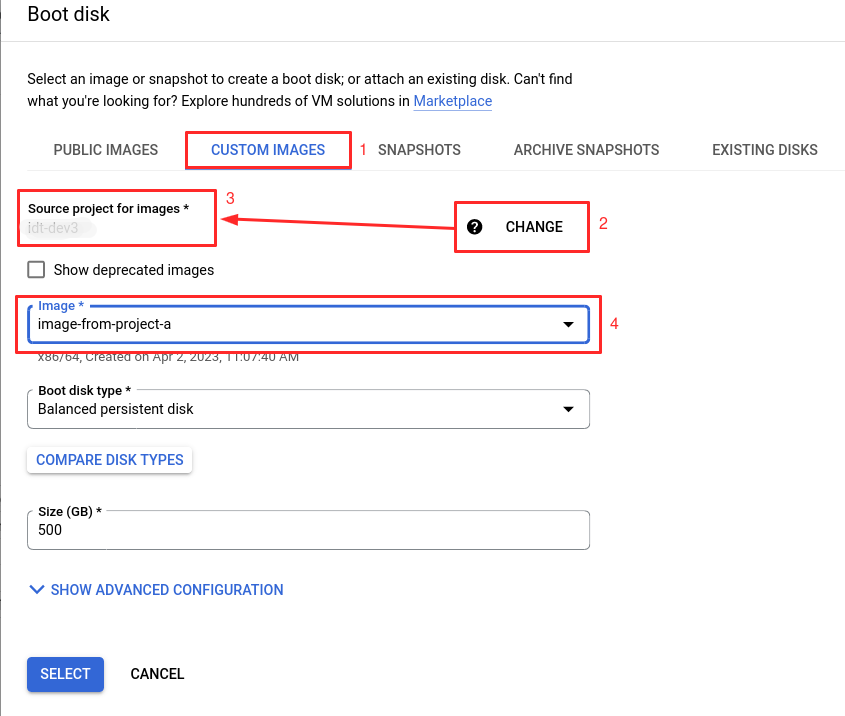
Once we click on the CHANGE button on the Boot disk option we will reach a new page where we can select the image that we have created in Project A, More details can be seen below images.
1) In the Boot disk window select CUSTOM IMAGES tab
2) Then we need to click on the button named CHANGE this will let us change the project to the project where our IMAGE is available, in our case the Image is available under Project A
3) Once we select Project A we will be able to select images available in the project
4) In our case the image name is image-from-project-a we can choose it and proceed further with the rest of the settings that need to update before the instance creation